Tuesday, April 22, 2008

Match to Live


Here is a project that I just finished trying to simulate reality as close to a photograph as possible. I took a cologne bottle cap and tried to frame it in an interesting compositing using my average digital camera. Then I took a photo of a chrome ball to simulate the reflections in the metal. I rendered the object in different passes: diffuse, shadow, occlusion1, occlusion2, reflection, and specularity and composited them in Shake. It first time using the software and I have pretty much got the hang of it in a couple of days because it is similar to the material editor in Unreal :) combined with the layers in Photoshop. Try and see if you can spot the CG clone.

Jonathan
Thursday, March 27, 2008

Today I was part of a group where we tried to make a viable game from a challenging topic: C-SPAN. We were restricted to come up with a full game in 45 minutes and here's the basics of what we got:

Rules:
- minimum of three players: Democrats, Republicans and an intermediary
- each person rolls to decide which roll they get
- the players draw a card on a political issue and are given a set amount of time to argue their position on the topic
- body language and clarity of speech are rated while the intermediary, while also using a guideline list for each party to make sure the person is hitting each key note
- surprise attacks in the form of office scandals would add to the challenge of the candidates persuading them self as the better opponent
- the game is educational -- dealing with current events and enlightening each player with the views of both sides (if they have a certain belief before the game, they are eventually put in a situation where they must argue the other position)
- the winner is deemed president

Sunday, March 23, 2008

CrazyBump!


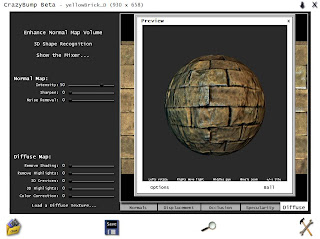
I have been hearing about this magical normal map program that is an industry standard called crazybump. Normal maps are basically bump maps (give the illusion of depth on a flat surface) that realistically react to light positioning and are usually generated from displacement maps (actual added geometry on a flat surface generated from a height map texture). I have been using the standard Nvidia photoshop filter plugin for my normal maps and really never had a problem with it--although it is hard to get a sense of what the final texture will look like on a model. Yesterday I decided to take a look at Crazybump and I must say that I had a great sense of awe when watching the demo movie on the site, www.crazybump.com . With this software you can make specular, ambient occlusion, displacement and normal maps; and I had thought it was only for normal maps. The only downside is that taking a straight up diffuse texture and converting it to bump usually doesn't give the right effect--so I still do the bump map in photoshop and then import it into crazy bump. I have only had a hint of experience with the program but at the moment it seems extremely promising and will definitely be a factor to my future projects.

Sunday, February 17, 2008

Unreal 3 Editor and Bubble Diagrams


I am currently working on a level for Unreal in my class. The other day we had to draw up bubble diagrams: which are node-based layouts in which events are simplified in the form of descriptive text with bubbles drawn around them. Each subsequent event or notable area (such as weapon pickups, health stations, npcs, etc.) are linked to the pertaining bubble. When all the bubbles are linked together they form a crazy-looking diagram. The Areas of more importance in the level are proportionately bigger than the smaller areas. With the simple bubble diagram layout, I drew up a basic floorplan sketch for my level and then refined in photoshop. I am building the level in 3DS Max and have imported most of it into Unreal 3 (no textures, yet); the green boxes are player references (96x64x64 px).
Here are some assets that I have created that can be placed anywhere in the scene.


I can't wait to see the final product. Stay Tuned!

Thursday, January 24, 2008

Call of Duty Mod Tools!

AS the title suggests, the Call of duty 4 SDK has been officially released for the PC. I can't wait to start fooling around with the level editor and try importing some of my own meshes into the engine. Hopefully the Radiant Editor won't be too different from the Doom 3 Editor, in which I am getting familiar with. The file can be downloaded at File Shack or File Planet for free. In effort to speed the process of the learning curve for the mod tools, Infinity ward has released a Call of Duty 4 Wiki: iwiki

Monday, December 24, 2007

Custom Texturing

I have been further learning the Radiant/Doom 3 Editor and have learned a lot about texturing. There are separate channels that the texture must be split up into: specular, normal map (bump), and diffuse. Diffuse= main color information and overall look of object; specular= highlights- a desaturated version of the diffuse with enhanced value gradation; normal map= grayscale version that is used to simulate a height map on a flat surface. An easy way to convert your diffuse maps into a normal map is the NVIDIA Normal map filter: a plugin that can be downloaded from http://developer.nvidia.com/object/photoshop_dds_plugins.html. All three of these separate channels are combined using a material file that tells each how to react to light. This is the magic of texturing! The texture cannot be viewed in its full effect until compiled in game. Texturing is tough business but pays off... in the words of 3D World Magazine: "texturing is 99 percent of the visual experience of a game."

Tuesday, December 11, 2007

Learning Radiant Editor

I have recently done some research on development companies such as Activision, ID, and Infinity Ward. Judging level editors by reading what Activision had posted on their site, it seems that they prefer, in order:

1)Radiant Editor
2)Unreal Editor
3)Quake Editor

Following this advice, I have since been learning tutorials from MODSonline.com and 3DBuzz.com about the Doom 3 Editor since it is Radiant-based. I already have the game and it comes with its own editor- also I like the detail that was achieved in the game. I immediately noticed that the editor has a simpler interface than what I was used to (Valve Hammer Editor). The feature I am most impressed with is the ability to Compile the level in a small window and run through it as if it were in-game. This is extremely helpful for fine tuning the color and distance of lights, etc., to get just the right feel. The editor seems to require a lot more scripting than that of Hammer, where every object seemed to be pre-programmed and the user just throws it in the game and it works. With the Radiant editor, I will be able to learn more about the inner workings of each level and have finer control of the output. At the moment I have a test level built but am planning on using the editor to make a level that has a completely different feeling than that of Doom. There is also a simple way to import 3D models from 3DS Max which also has me very excited. Stay tuned for my first finished level!