
Monday, March 17, 2014
Chair 01 WIP
Doing this chair for a living room environment I've been working on. Heavy use of Zbrush and dynamesh. The texture is a 2048. I baked the normals and polypaint from Zbrush using xNormal. The ambient occlusion was baked from Maya. Rendered in Marmoset. I am calling this one done for now and I may tweak later but want to get all of the other main props for the environment finished.

Sunday, November 17, 2013
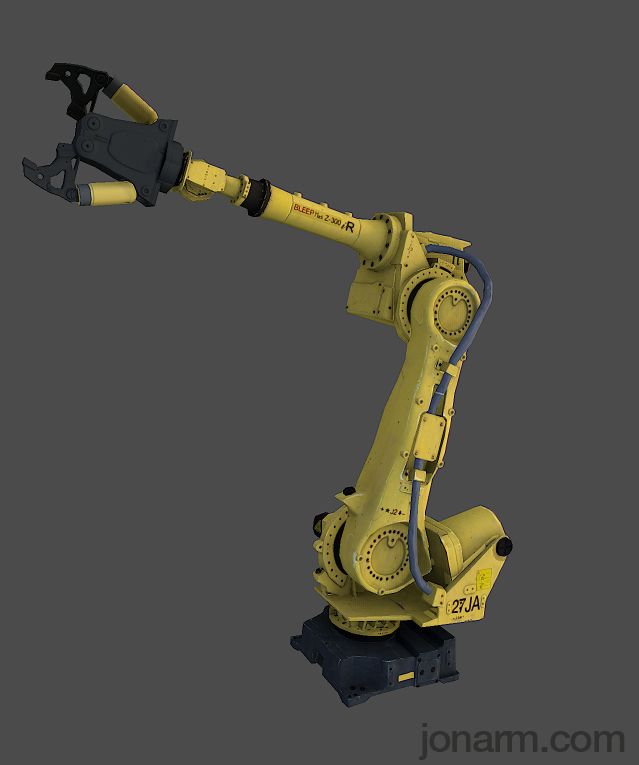
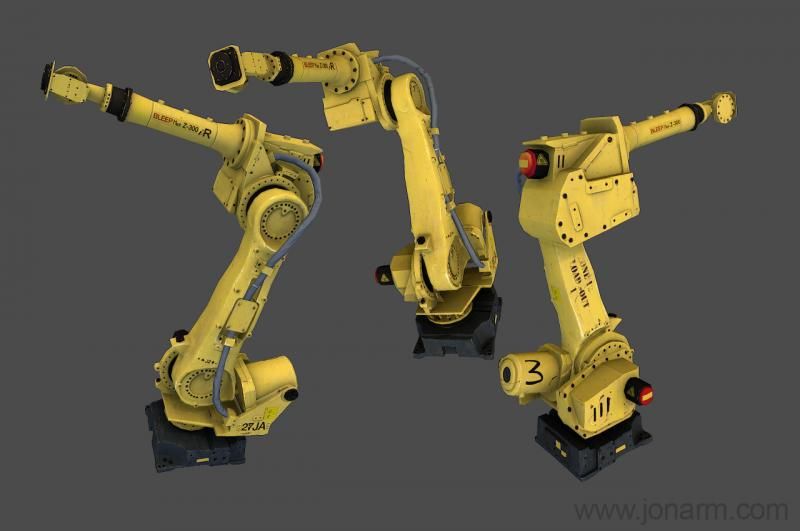
Robot Arm WIP 5
I'm calling this one finished! Got around to creating the specular map, added a subtle diffuse for the cable and altered small text on labels and added some missing cracks and re-baked the normal on the big black pivot bolt to dial in the mesh. Here's the outcome:


Sunday, November 10, 2013
Robot Arm WIP 4
Latest update: textured the claw. Next I will be tweaking the diffuse (I am thinking more weathering or at least variation on the flatter hues) and also creating a specular map.


Monday, October 21, 2013
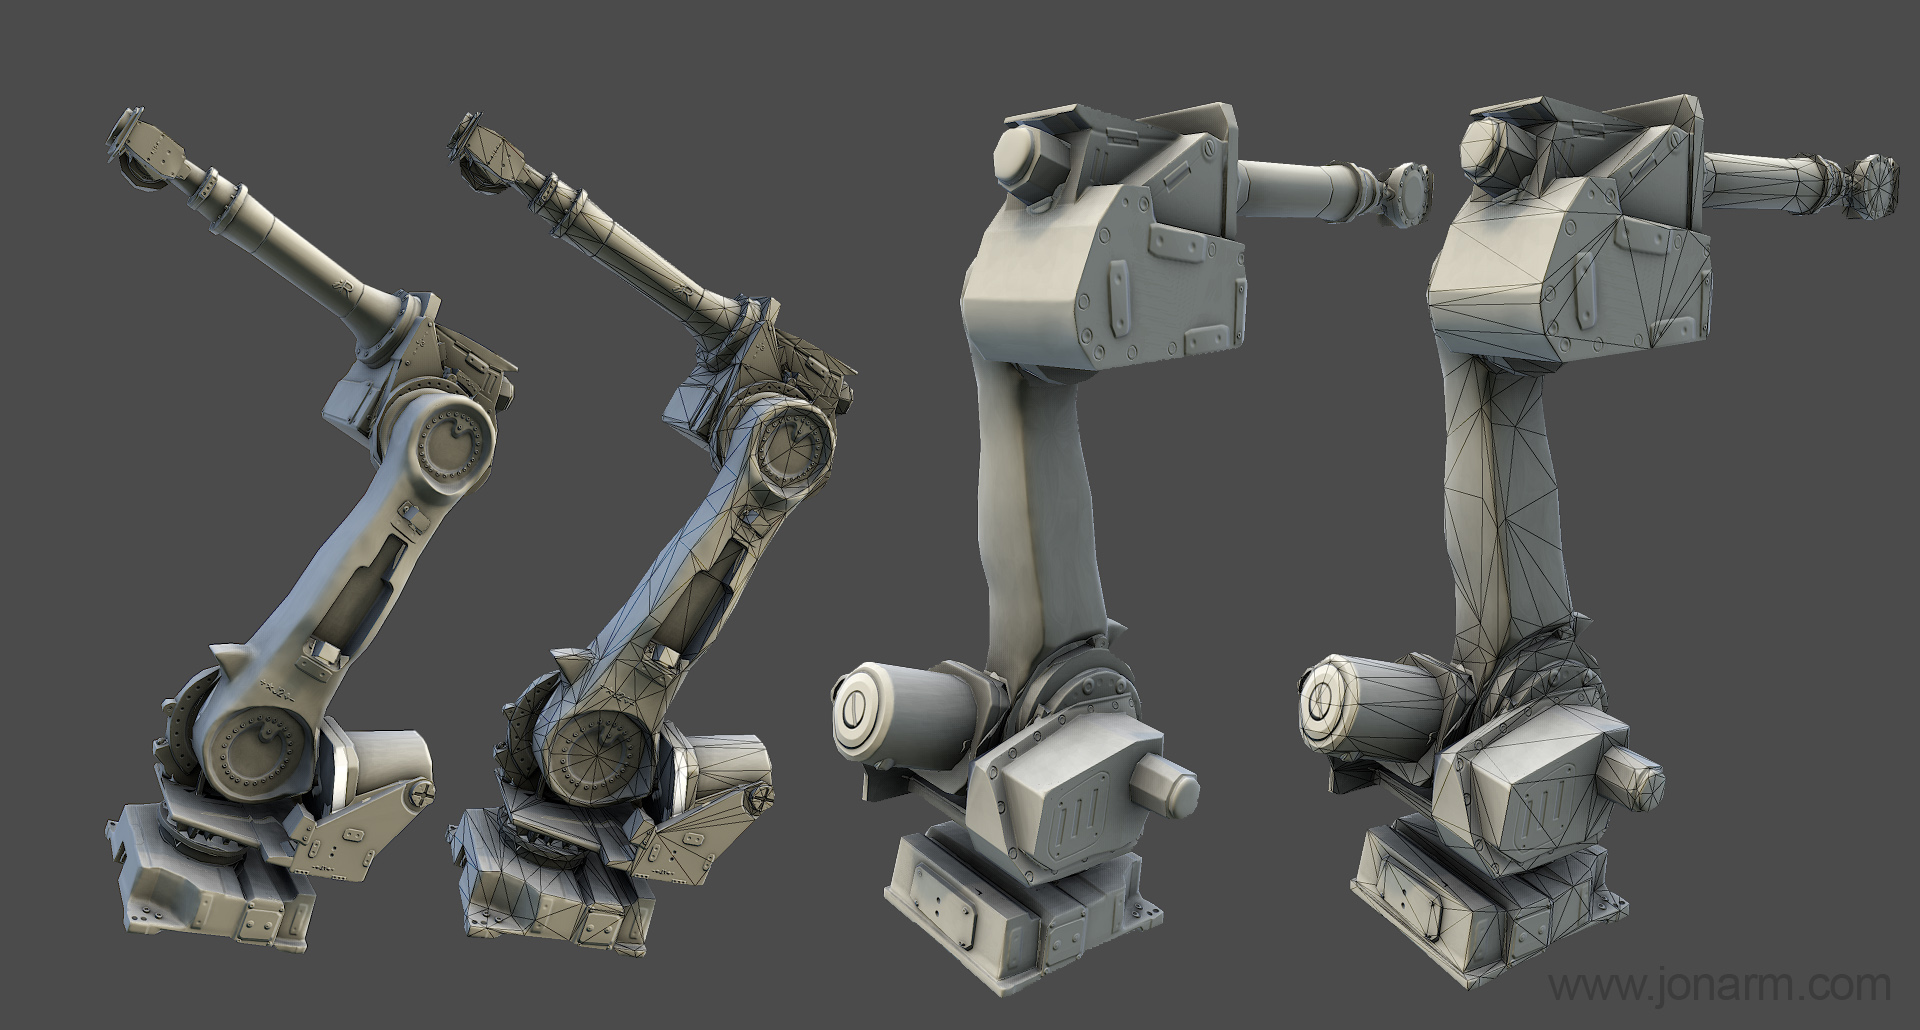
Robot Arm WIP 3
I've added a claw and just threw in some flat colors and baked out the normals from Zbrush. Next I will use spotlight to get a better Diffuse and then move on to the gray cable diffuse and the overall specular map.

Sunday, October 13, 2013
Robot Arm WIP 2
I've got around to quickly texturing this bad boy and it seems that the diffuse looks great with the spotlight feature in Zbrush and just painting onto the 3D mesh and extracting the diffuse in xNormal. Of course I still have to do some editing and adding small details like text and labels and overlaying the ambient occlusion map. Already the model is looking way more interesting with the Diffuse texture added.
Next, I plan on texturing the cable and adding label text where the blank labels currently are. I will also add a specular map and that should really pop the dark black medal and add more variation and interest across the entire model.

-Jonathan
Next, I plan on texturing the cable and adding label text where the blank labels currently are. I will also add a specular map and that should really pop the dark black medal and add more variation and interest across the entire model.
-Jonathan
Sunday, August 11, 2013
Robot Arm WIP 1
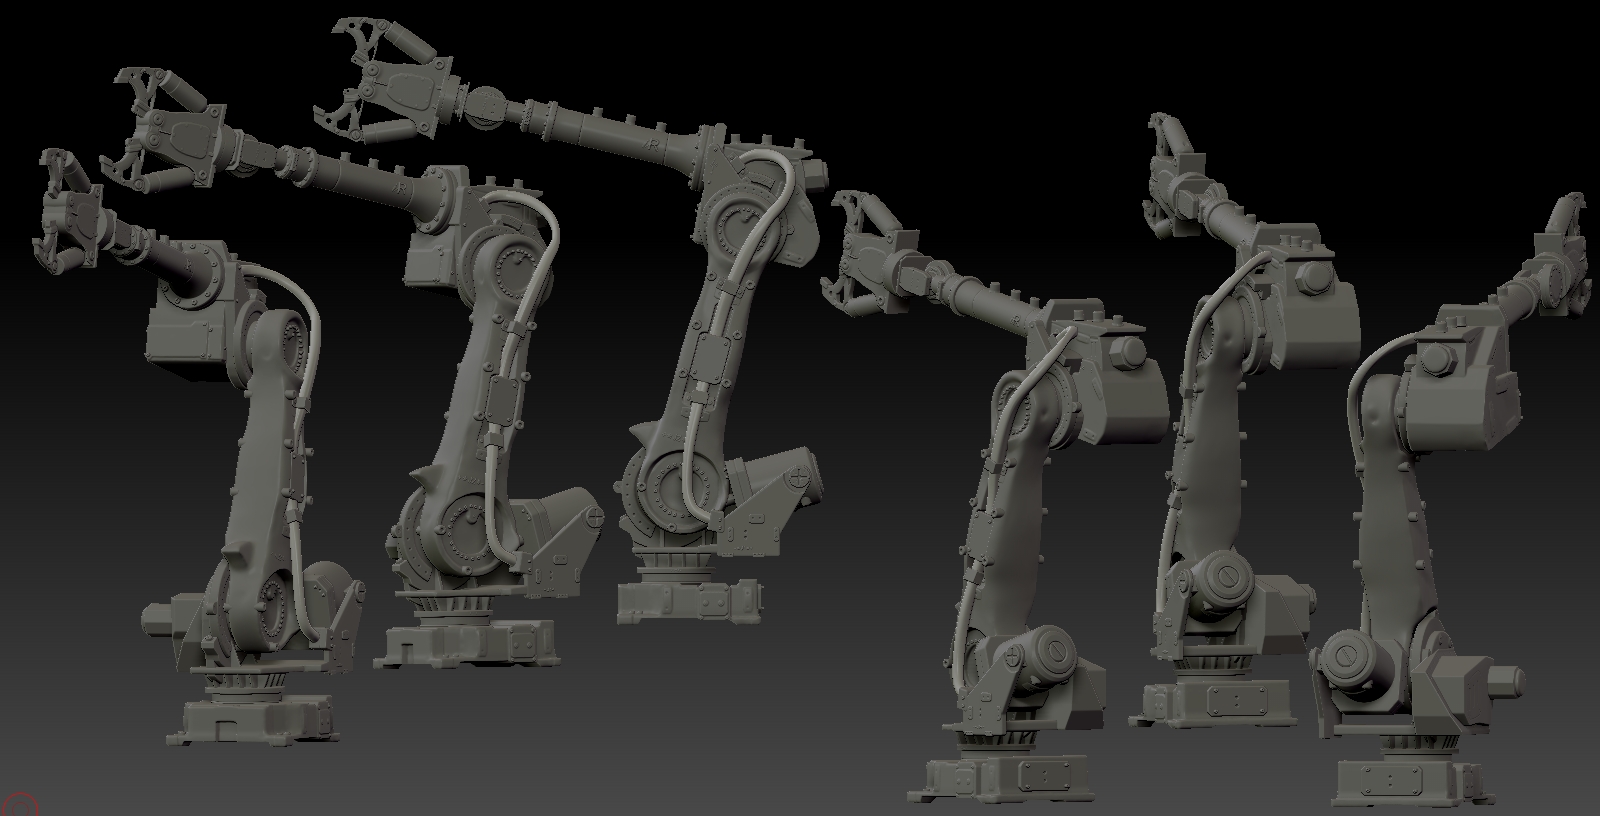
I thought I had created a work in progress post about this already, but I have been a lot more work in Zbrush and particularly with hard surface sculpting and using the Dynamesh feature with Zbrush 4R5. I decided to make a challenge for myself so I picked the most interesting piece of machinery that I could. These are the arms that are used to work on cars and do other repetitive tasks in assembly lines of factories. I have got to the stage of created a low res mesh and baking the normals with xNormal. I never knew the power of xNormal but I am very happy with the results, as I don't have to worry about the UV correlation between the high res and low res mesh, only the low res. The object is currently 3,194 tris and 1,589 verts. This was down from about a 15-25 million poly mesh in Zbrush. :) Here are the screenshots, from the Zbrush viewport and in Marmoset Toolbag:

 -Jonathan
Tuesday, September 4, 2012
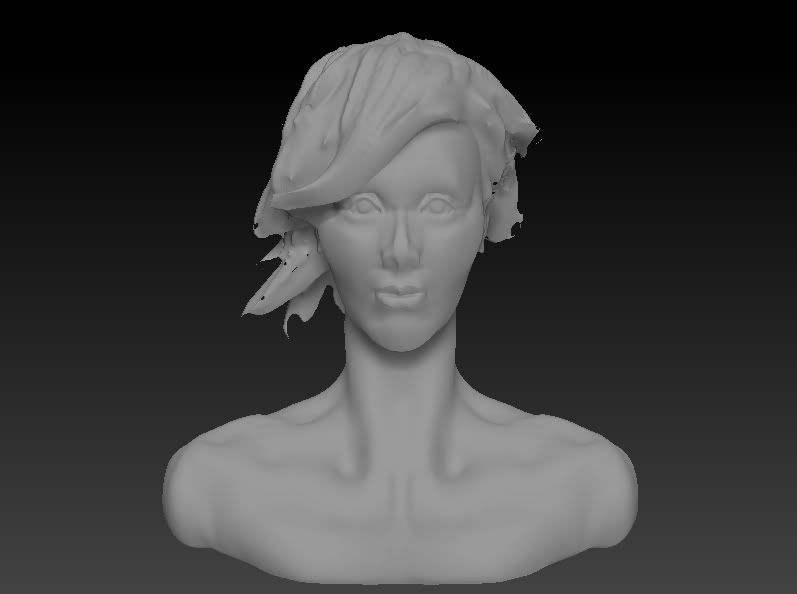
Female Bust WIP
I've been doing more Zbrush practice. Here is a female bust that I've been working on. I plan to get a low-poly version into Maya with UVs.

Added eyes and softened the cheekbones: I didn't like the proportions, so I rounded out the face and shortened the neck. I also refined areas like the mouth, nose and eyes. I also added more detail to the hair:

I used Polypaint to add texture (the shader is the flat-lit "chalk"). I forgot the eyebrows so I roughed them in using Photoshop:
Next, I intend to fix the holes in the hair and to add differences in material properties using specularity and glossiness for the eyes and lips.

Added eyes and softened the cheekbones:
 I didn't like the proportions, so I rounded out the face and shortened the neck. I also refined areas like the mouth, nose and eyes. I also added more detail to the hair:
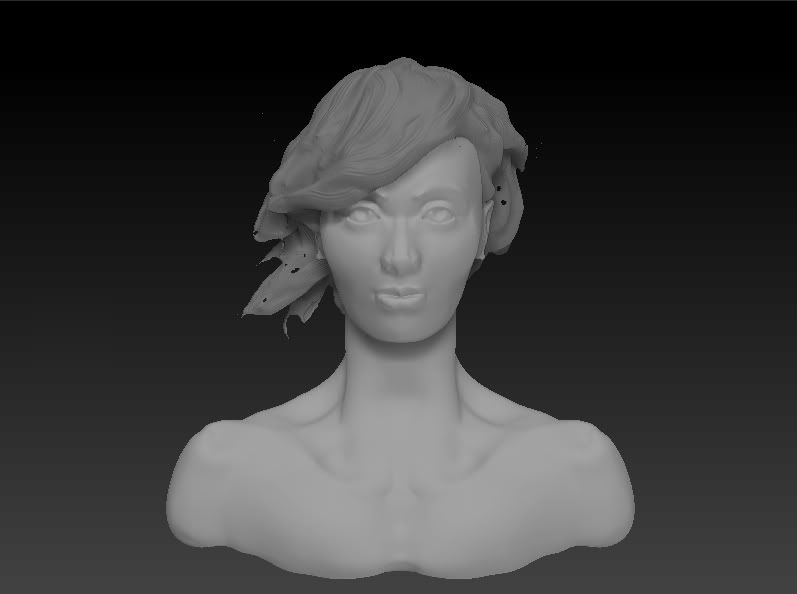
I used Polypaint to add texture (the shader is the flat-lit "chalk"). I forgot the eyebrows so I roughed them in using Photoshop:
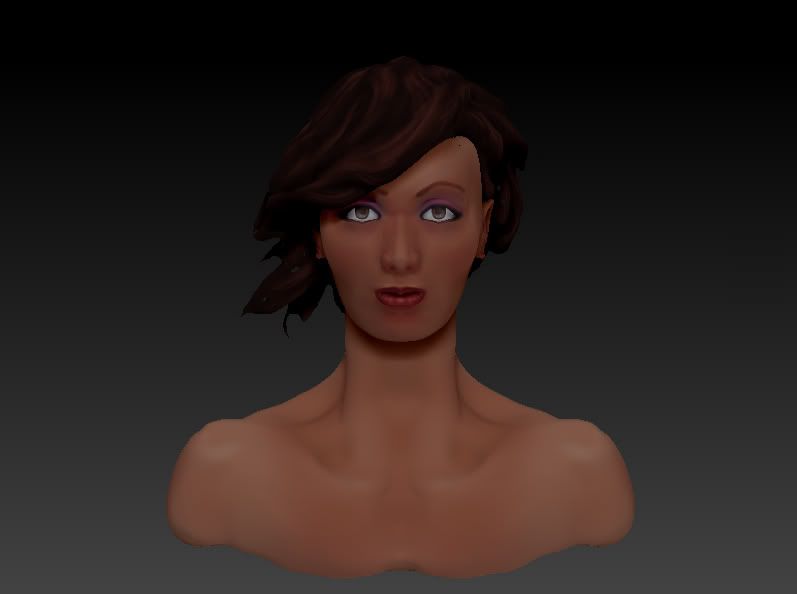
Next, I intend to fix the holes in the hair and to add differences in material properties using specularity and glossiness for the eyes and lips.
Subscribe to:
Posts (Atom)